One of the most interesting and exciting aspects of flour photography is simply not knowing exactly how images will to turn out when shooting at high speeds.
The experimental process that follows is almost as entertaining as the results you will achieve if you persist and maintain your enthusiasm.
In the following video tutorial, photographer Evan Sharboneau from Photo Extremist will show you how to take high speed photographs of colored flour thrown into the air.
Whilst this process may sound simple in theory, technique is important and shouldn’t be underestimated.
If you wish to recreate similar effects in your high-speed photography you will need the following photographic equipment and materials.
Photographic Equipment & Materials:
- Holi powder (If you don’t want to make your own…)
- Regular flour or cornstarch
- Food coloring dyes or gels
- Plastic bags
- Large dust pan
- 3x Speedlite flash units or strobe lights
- Wireless triggers
- Softbox or umbrella
- Model or subject
- Assistants
Let’s Get Started…
Begin by placing flour into a plastic bag, then add a small amount of food coloring dye or gel and mix everything together to create your colored flour.
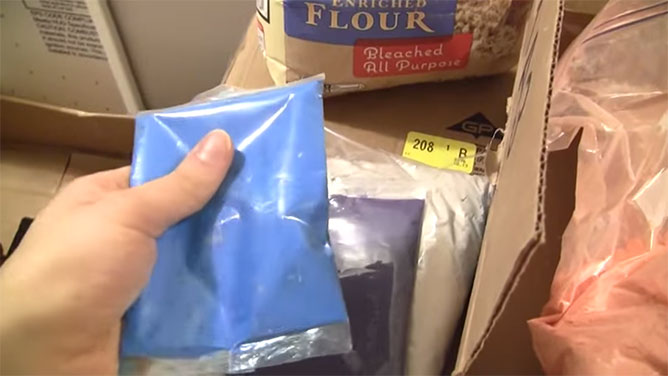
Next, place individual rows of colored flour across the width of a large dust pan, keeping in mind that this doesn’t have to be exact and you should experiment with each photograph.
Ideally you would want your photo shoot to take place on private property when it’s not wet and the humidity levels are quite low, otherwise when flour and water are mixed together you’ll end up with dough like substance which can make cleaning up afterwards extremely challenging.
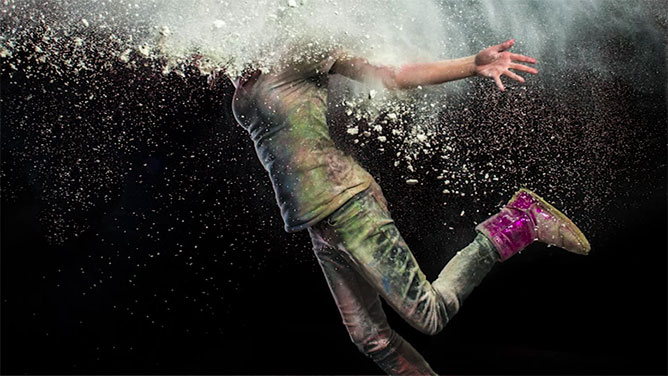
In order to highlight and differentiate your colored flour from the background of your image you will need to place one flash unit in front of the subject, two flashes behind aimed directly at your subject which will act as backlights.
Backlighting your subject also works well when photographing smoke, rain & snow.
To improve the skin tones and overall appearance of your model you might want to attach a softbox or umbrella to your front fill light, but depending on the desired effect you are trying to create this may or may not be appropriate.
In a perfect world you would get an assistant to throw the flour onto the model from the side or slightly behind making sure not to be in the frame of your photograph.
But with two assistants, you could work with multiple colors thrown from different angles and directions which could prove more effective.
The saturation and vibrancy of the flour is determined by the colors you choose and the amount of dye or gel that you have added to your flour mixture.
If you are unhappy with the color in your images don’t worry because this is where photoshop comes in very handy.
Photoshop – Adding Color & Saturation:
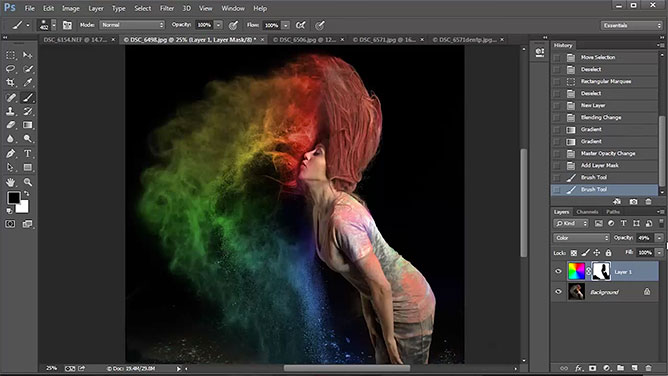
- Start by adding a new layer within photoshop and set its blending mode to “Color”.
- Select the “Gradient Tool” and then select the “Gradient Editor” and choose “Spectrum”.
- Then proceed to add a gradient to your new layer and then reduce it’s opacity to 50%.
- Now, exclude your model from any additional color adjustment by adding a layer mask and selecting only the areas within the photograph that you would like to apply color.
A Little Bit Of Imagination…
So, as you can see by the examples demonstrated within this tutorial, a little bit of imagination goes a long way and can result in a portfolio of very artistic imagery.
If you liked this video tutorial and are interested in learning more creative photography techniques from Evan, check out his course called Trick Photography & Special Effects which has been designed to open your mind to the unlimited possibilities of digital photography.


Share This Post With Your Friends...
Share the post "Flour Photography: High Speed Imagery Using Holi Powder"