It’s not often that I get annoyed or frustrated with my DSLR, but on occasions after I’ve come home from an enjoyable shoot, downloaded my images and began editing that I realise my camera’s sensor is covered in microscopic dust, dirt or hair.
The auto sensor cleaning mode found within most DSLR camera’s aren’t very effective at removing unwanted intruders from your imagery, but fortunately removing dust isn’t rocket science. A little knowledge and the right tools will have you capturing dust-free, crystal clear images.
In this video tutorial, Karl Taylor will teach you how to clean your DSLR camera sensor using a variety of different photographic techniques that are simple and easy to implement.
Photographic Equipment & Materials Required:
- Can Of Compressed Air (Kenro Kenair)
- Dust Cleaning E-Wipes Or Swabs
- Dust-Aid Wand With Solution
- Dust-Aid Silicon Block Kit
1. ) Remove Your Camera’s Lens From Body
By now you should be familiar with removing your lens from your DSLR camera body, but if this isn’t the case please refer to your digital camera’s instruction manual for further information.
2. ) Select Menu Settings / Sensor Cleaning / Clean Now
On the back of your digital camera (canon) select menu and locate sensor cleaning. Under sensor cleaning you’ll find several different options, select “clean now”.
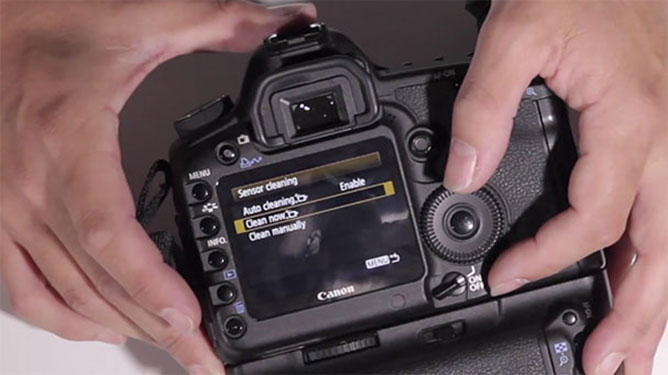
“Clean now” is the built-in cleaning mode which vibrates the surface of the camera’s sensor attempting to disturb and shake away any dust that may have accumulated overtime. Unfortunately, “clean now” only works occasionally to removal dust, dirt and hair that isn’t adhered to the surface of the sensor but isn’t overly effective.
3. ) Select Clean Manually
If the automatic cleaning mode built into your DSLR doesn’t successfully clean your sensor of grit and grime you’ll need to resort to cleaning your camera’s sensor manually.
To begin, we’ll need to reposition the mirror to safely gain access to the camera’s sensor. Within the sensor cleaning options you’ll find “clean manually” which when selected will lock the mirror open exposing the sensor.

Before you select “clean manually” please make sure that you have fully charged your camera’s battery, because leaving your mirror permanently open in this mode will drain your battery power. The last thing you want is for your battery to run out whilst you’re in the process of cleaning your sensor and damaging your mirror mechanism, so be extremely careful.
Select, “clean manually” to expose your sensor for manual cleaning.
4. ) Utilising Compressed Air
Now that the camera’s sensor is visible we are going to use a can of compressed air to displace any dust, dirt or hair that may have accumulated.
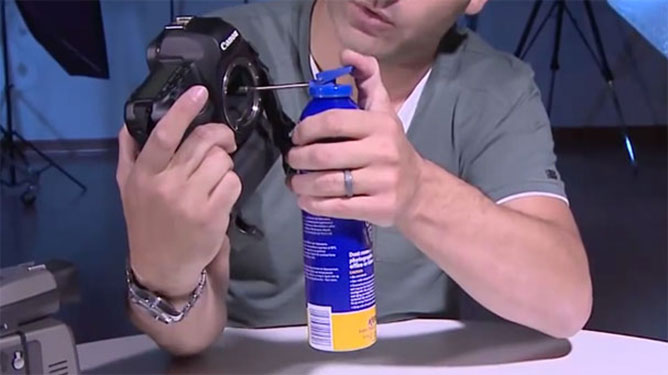
Don’t hold the can of compressed air upside down because it will expel moisture which can damage your camera. Test firing your compressed air away from your camera will help to expel any moisture that may be present if it hasn’t been kept in an upright position.
Holding your camera’s body in a slight downward position will aid in the removal of dust when blasting your sensor with compressed air.
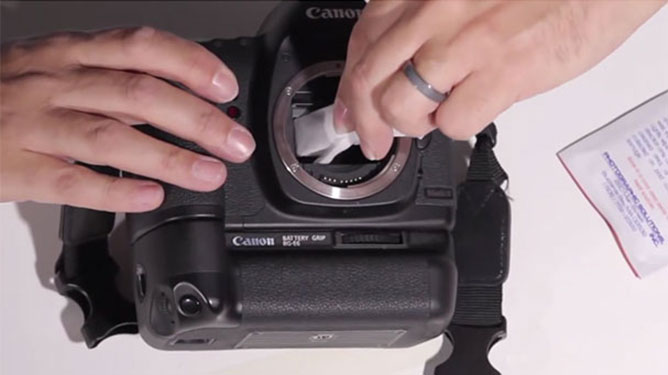
5. ) Photographic E-Wipes Or Swabs
If you happen to own a medium format digital camera then cleaning your sensor is relatively easy. Generally speaking compressed air should be sufficient, but if your sensor does require additional cleaning you can use photographic e-wipes.

E-wipes are moist and have been coated in solution to assist with the cleaning process. Gently wipe across the surface of your sensor in a single motion. Any residue that appears to be left on the sensor afterwards will evaporate shortly and there is no need to attempt to remove it.
6. ) Dust-Aid Cleaning Wand & Cloth With Solution
Cleaning your DSLR’s sensor can be difficult due to the compact design and size.
Cleaning your DSLR’s sensor can be difficult due to the compact design and size. Therefore, I recommend using a cleaning wand (with solution) which will help you reach and clean your DSLR camera’s sensor accurately.
Alternatively you could simply wrapped an e-wipe around your cleaning wand to achieve similar outcome.
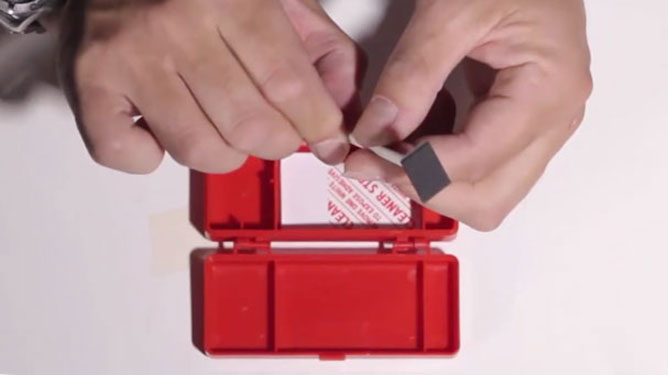
7. ) Dust-Aid Silicon Block
If all else fails then you can use a silicon block kit which will attract and catch any stubborn hair or dust by simply pressing down gently (do not wipe) on the sensors surface.
Once you have finished cleaning your DSLR camera’s sensor you will need to release and close the mirror. To restore your mirror back to it’s primary position and deactivate “clean manually” mode, simply turning off your camera.
If you liked this video tutorial and are interested in learning more about how to improve your digital photography skills, please head over and take a look at Karl Taylor’s blog where you’ll find a variety of valuable photographic courses and resources.


In Thailand, there is no compressed air to be had here. If you can find it, it is expensive so everyone uses air bulbs to squeeze air at the offending spots. This isn’t much help to blast out a Mac Pro or other type tower comp, but for camera cleaning it works just fine.
Thank you Eric, I really appreciate your advice and sure others will too…