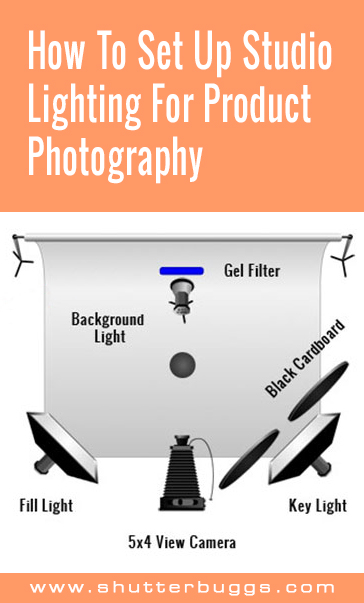
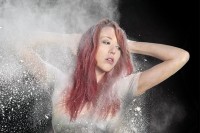
In this tutorial, I’m going to outline how to set up studio lighting for product photography that can be replicated from the comforts of your own home. But before we begin, I’d like to make a quick disclaimer.
In order to create a photograph like the one shown here you will need to have access to certain resources, but with that said you don’t need to go out and spend your hard earned savings on new photographic equipment.
With a little bit of ingenuity and creativity you can use generic items found around house or at the local store to piece together a similar result.
For the purpose of this article I’m going outline the resources I used to construct this still-image and also point out a few alternatives resources that you can use in place of items found on this list along the way.
Photography Equipment Used:
- Roll of black background paper
- Non-reflective black cardboard
- Clamps to hold the microphone and cardboard in place
- 5x Light stands
- 3x Elinchrom flash units
- 2x Softboxes for Elinchrom flash units
- 1x Standard Elinchrom flash reflector hood
- 1x Flash sync cable
- 5×4 view camera with 210mm lens
- Shutter release cable
- E6 Transparency slide film
- Manfrotto tripod
- L-608 Sekonic Lightmeter
- Color Filters
Hopefully the above list of equipment hasn’t put you off creating your very own studio lighting setup, because the reality is you don’t need to go to the extremely lengths I have… in order to produce studio quality photographs.
Alternative Photography Equipment:
- Light Sources – Off camera flash units or desktop lamps
- Light Diffusers – White bed sheets, vellum or tracing paper
- Light Reflectors – Aluminum cooking trays or white cardboard
- Light Meter – Use your digital cameras in-built light meter with a grey
card to easily determine the ratios between individual lighting - Filters – Colored cellophane
As you can see, simple house hold items can easily be transformed into studio props and handy equipment without any difficulty.
1. ) Product Placement
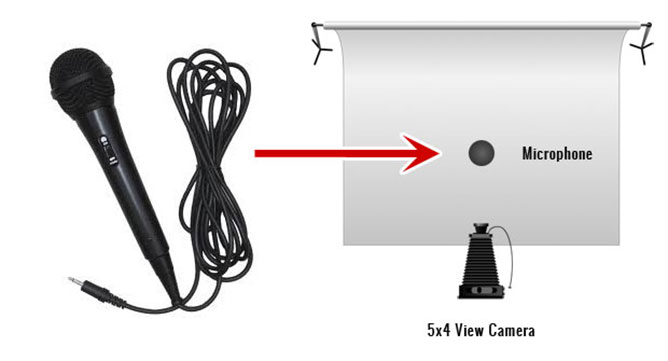
The process of setting up a studio space isn’t very involved. In this example, I made space in my living room where I place my background, a roll of paper which was supported by a rod that was mounted on two light stands.
The microphone is held in place using a clamp and a stand which is then placed in the center of my background, about one and half meters from the face.
(Now, depending on your home and equipment, the distances described in this example may not apply to you, which is why you may have to improvise and adjust accordingly.)
Then I setup my tripod on which I placed my 5×4 view camera. For this photograph, I chose to use a 210mm lens which enabled me to fill the frame quite easily.
2. ) Fill Light

Now that I have my camera, subject and background roughly in position it’s time to go ahead and set up my first light source which in this example is my fill light.
The fill light is just one of three elinchrome lights that I’m going to be setting up and as a rule of thumb it’s best only to work with one light source at a time, this way you’ll know exactly what each light is doing and how they are effecting each other.
Attached to the fill light is a softbox which is primarily designed to soften the quality of light produced by the flash as demonstrated by in this image.
Fill lights generally speaking produce just enough luminance to evenly illuminate (fill) in the shadows.
To determine the output of my fill light, I used a light meter and set the flash output to return a reading of F5.6 at 1/125 of a second at ISO 100. From here, I can now decide upon the output required for the key light.
3. ) Key Light
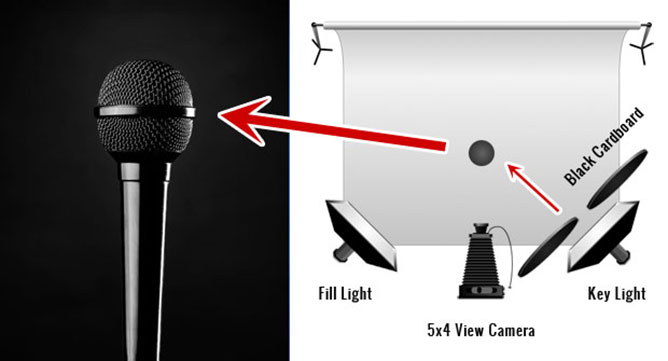
To add contrast to this photograph, I’m going to be using a 4:1 lighting ratio which simply means that the brightness of the key light is 4x times (+2 stops) greater than that of the fill.
So with the fill light set to F5.6 at 1/125th of a second, I would need to set the key light to output at F11 at 1/125th of a second, two stops difference at determined by my light meter.
Key light is the primary source of illumination within a photograph creating contrast, depth and dimension.
The key light is primarily going to act as an edge light, highlighting the right hand side of the microphone.
Ordinarily, edge lights are positioned at a 90 degree angle to the subject, but because of the overall size of my softbox, I’ve decided to leave my key light at an angle of 45 degrees and instead controlled the amount of light falling of the microphone by using black cardboard.
Two pieces of non-reflective black cardboard were placed in front of the key light shielding the microphone. I then proceeded to create a fine line between the two sheets of cardboard where the light could pass, impacting only the edge of the microphone.
Now that I’ve step up both the key and fill light I can do a test shot using a digital camera to determine whether or not there is going to be any contamination or light spillage on my background.
If you find this to be true, simply reposition your background until it’s far enough away from your light sources.
4. ) Background Light
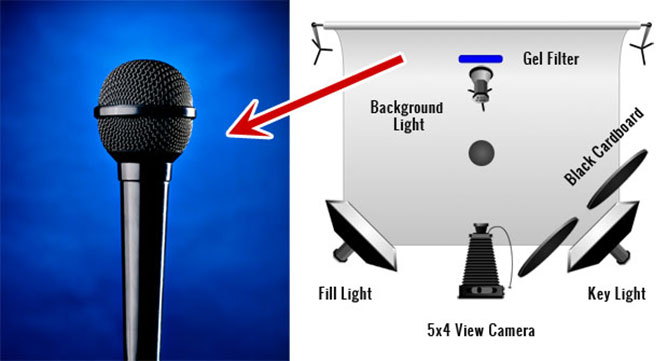
Finally, the last light source I’m going to setup and configure is the background light.
Background lights provides distinct separation between the subject and the background.
In the illustration above, you’ll notice that I have place the background light just behind the microphone. Whilst the positioning of the background light must be behind the subject, that’s not to say you can’t offset your background light to the left or right to achieve a totally different effect.
I’ve also reduced the height of the light stand so that it’s not in shot and thus shooting slightly upwards. Because I am using colored gel filters, I am not using a softbox instead opting for a standard elinchrome hood with a filter holder.
The filter I’m going to be using is a deep blue, but essentially you can use any color you like keeping in mind that you will need to adjust the output of your flash accordingly and that some colors tend to bleed more than others such as red.
Once again, I use my light meter to configure the output of my flash in relation to my fill and key light. I set my background light to a brilliance of F8 at 1/125th of a second.
Hopefully this insight into how to setup a professional studio from home has inspired you and remember you are only limited by your imagination.


I take pictures of Italian charms which are 9mm and very difficult! They are difficult for the reasons of many different colors, shiny, matte, stainless steel.
Biggest complication is also, if for our site I use to be able to do 500 pixels for finished image. Now it is 1100 which is very difficult for everything. My dream is to take the photo, size it, check and fix the white balance and be done with it, and being to move onto the next photo. We have over 5000 products on our web site. Thanks, Tracy